SimpleStrings
Mechanical engineering students at Purdue University participate in a semester long capstone project in teams of six. The goal of the project is to propose, design, and produce a prototype of a product to solve a problem of the team’s choice. My team decided to combine our experience with mechanical, electrical, and software engineering with our passion for music to create SimpleStrings, an assistive guitar playing device.
SimpleStrings was designed as a tool for music therapy. Music Therapy is the practice of using music in a therapeutic relationship to address physical, emotional, cognitive, and social needs of individuals. It can be used to help individuals in many situations, including brain injuries, dementia, dyslexia, autism, mental illnesses, and more.
Table of Contents
Problem Definition
Guitar can be a challenging instrument to use in music therapy situations. It involves complex hand configurations and memorization to produce chords. In situations where therapy is the end goal (not learning to play the instrument itself), this learning curve can cause frustration on the part of the player. During our initial research phase, my teams spoke to 9 music therapy professionals and 2 special educators. We learned from them that some of their patients love the guitar, and a method of facilitating access to the instrument would improve their music therapy experience and outcomes.
With that in mind, we set out to design a device that would make it easier for individuals with varying physical and/or mental abilities to play the guitar.
Design
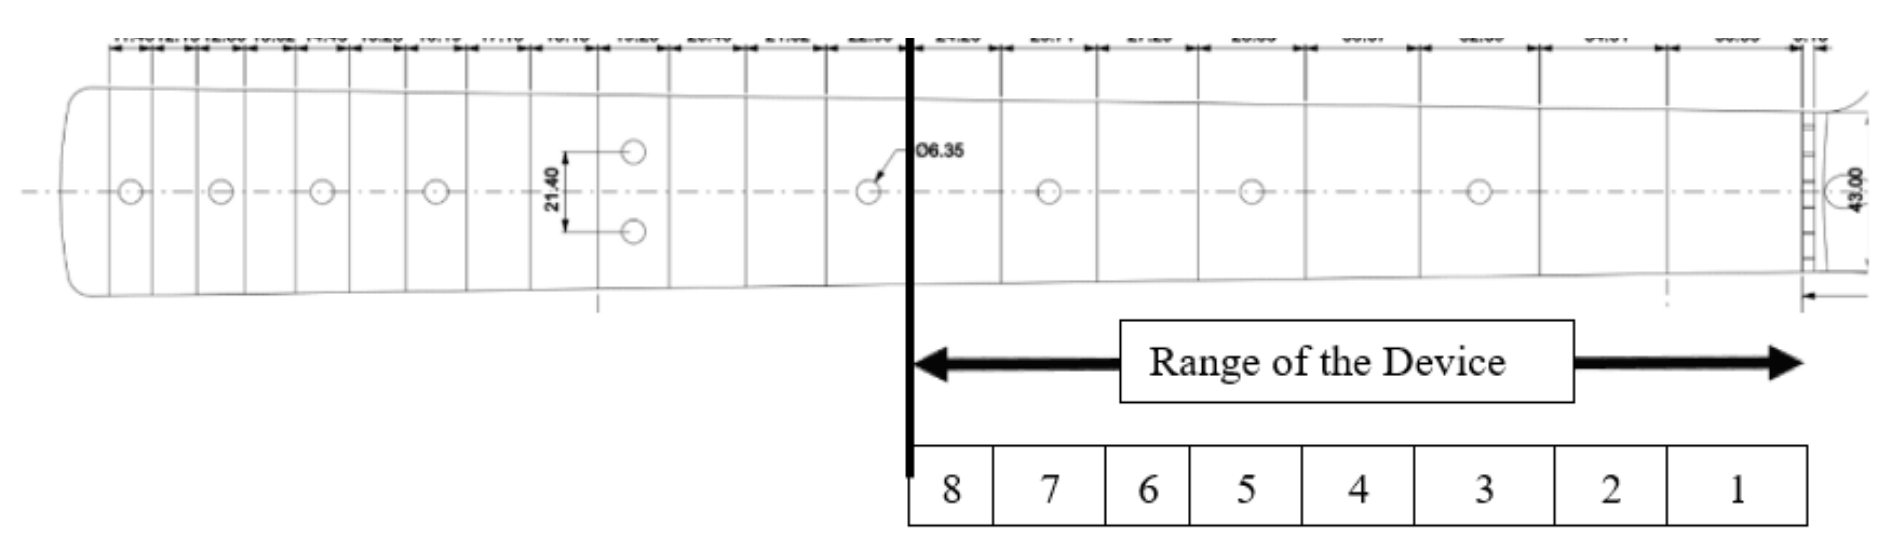
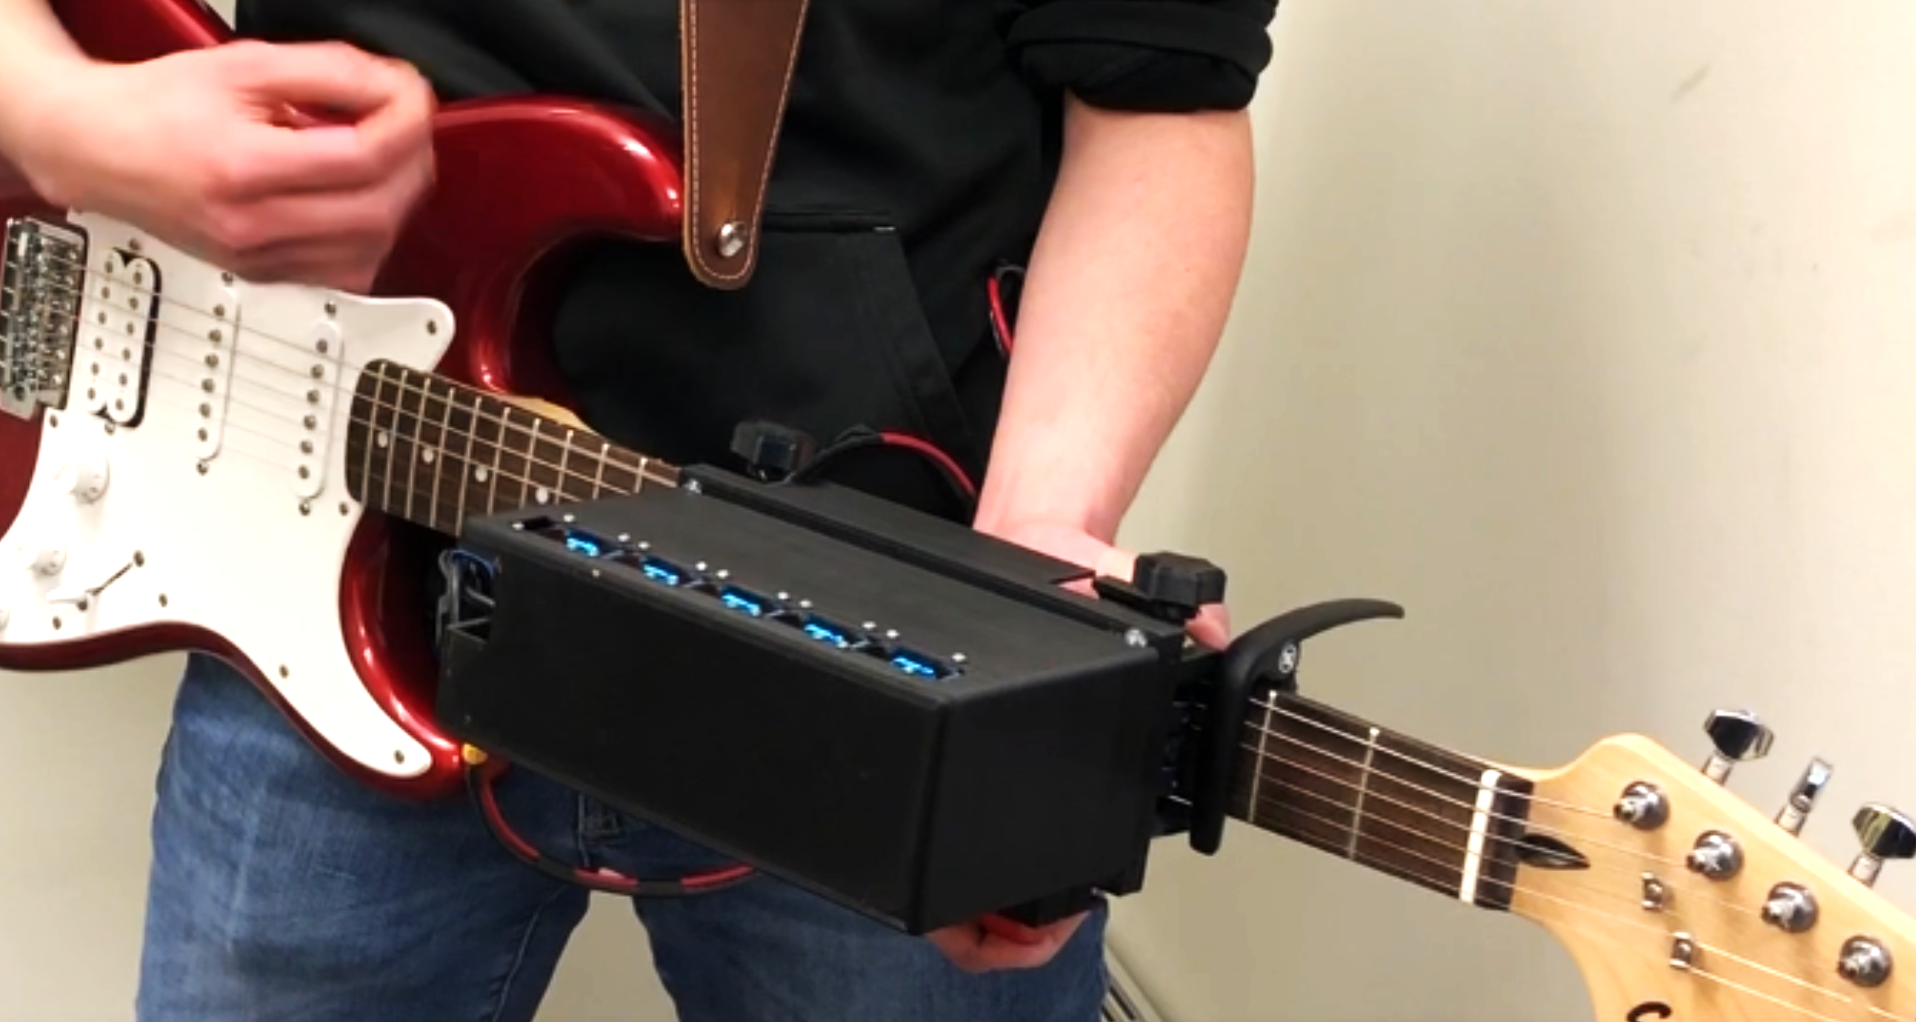
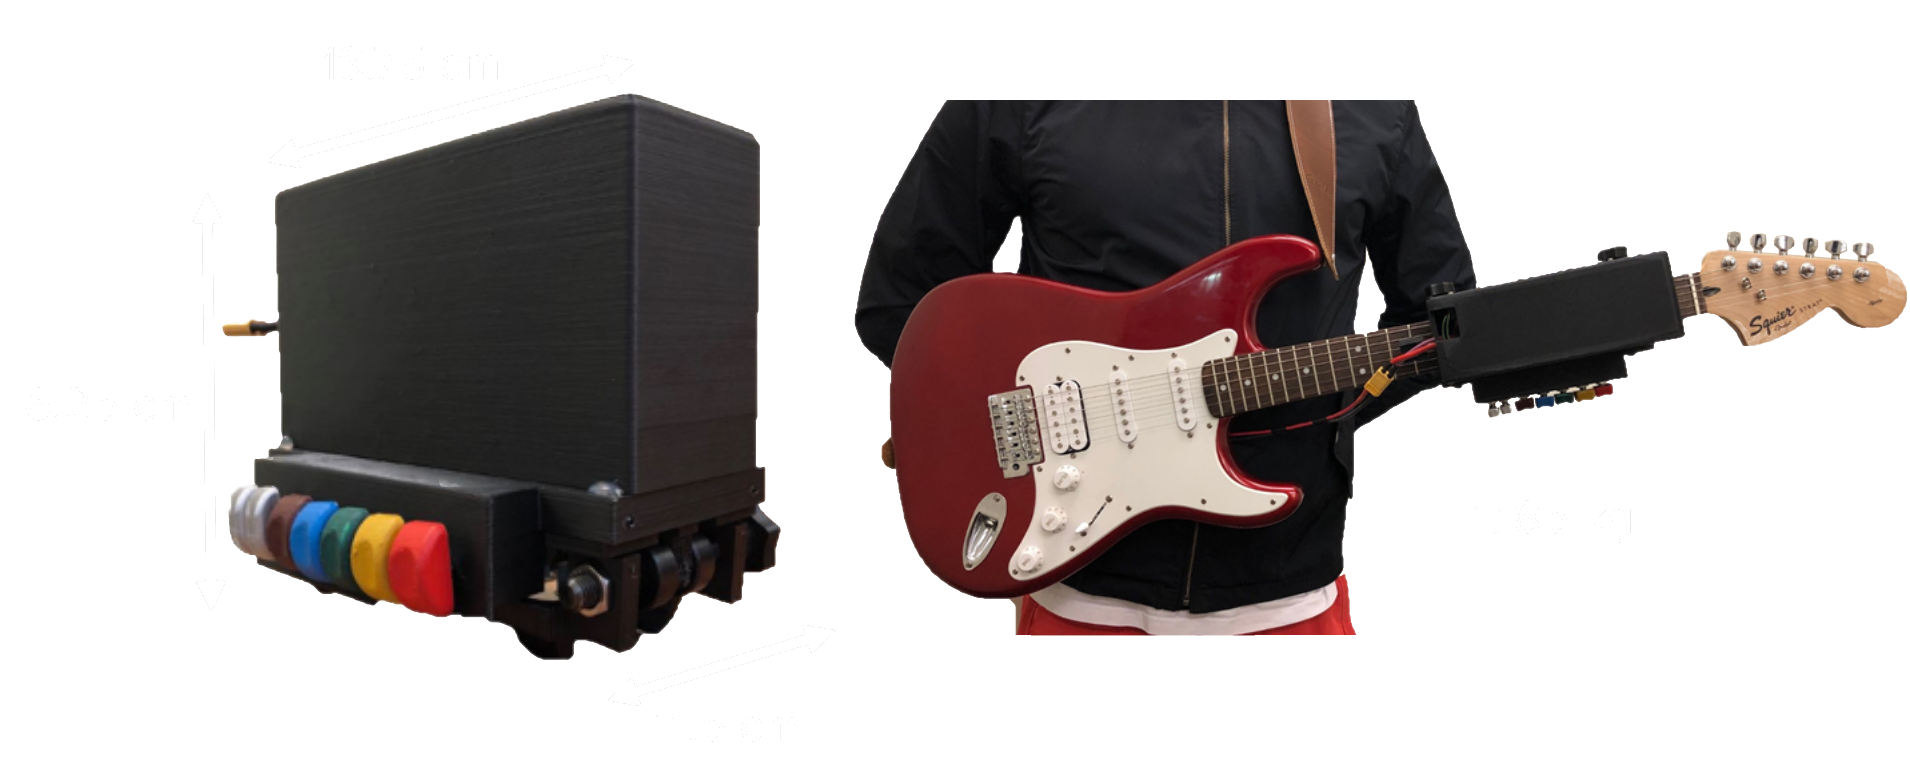
The SimpleStrings device is designed to attach directly to the neck of a guitar (this prototype was built for a Fender Squier Stratocaster). Its working area covers 4 frets at a time, but the device can be repositioned in between songs to 5 different positions along the guitar neck. This means that, if used with a standard guitar capo, SimpleStrings can be used to play music in any desired key.
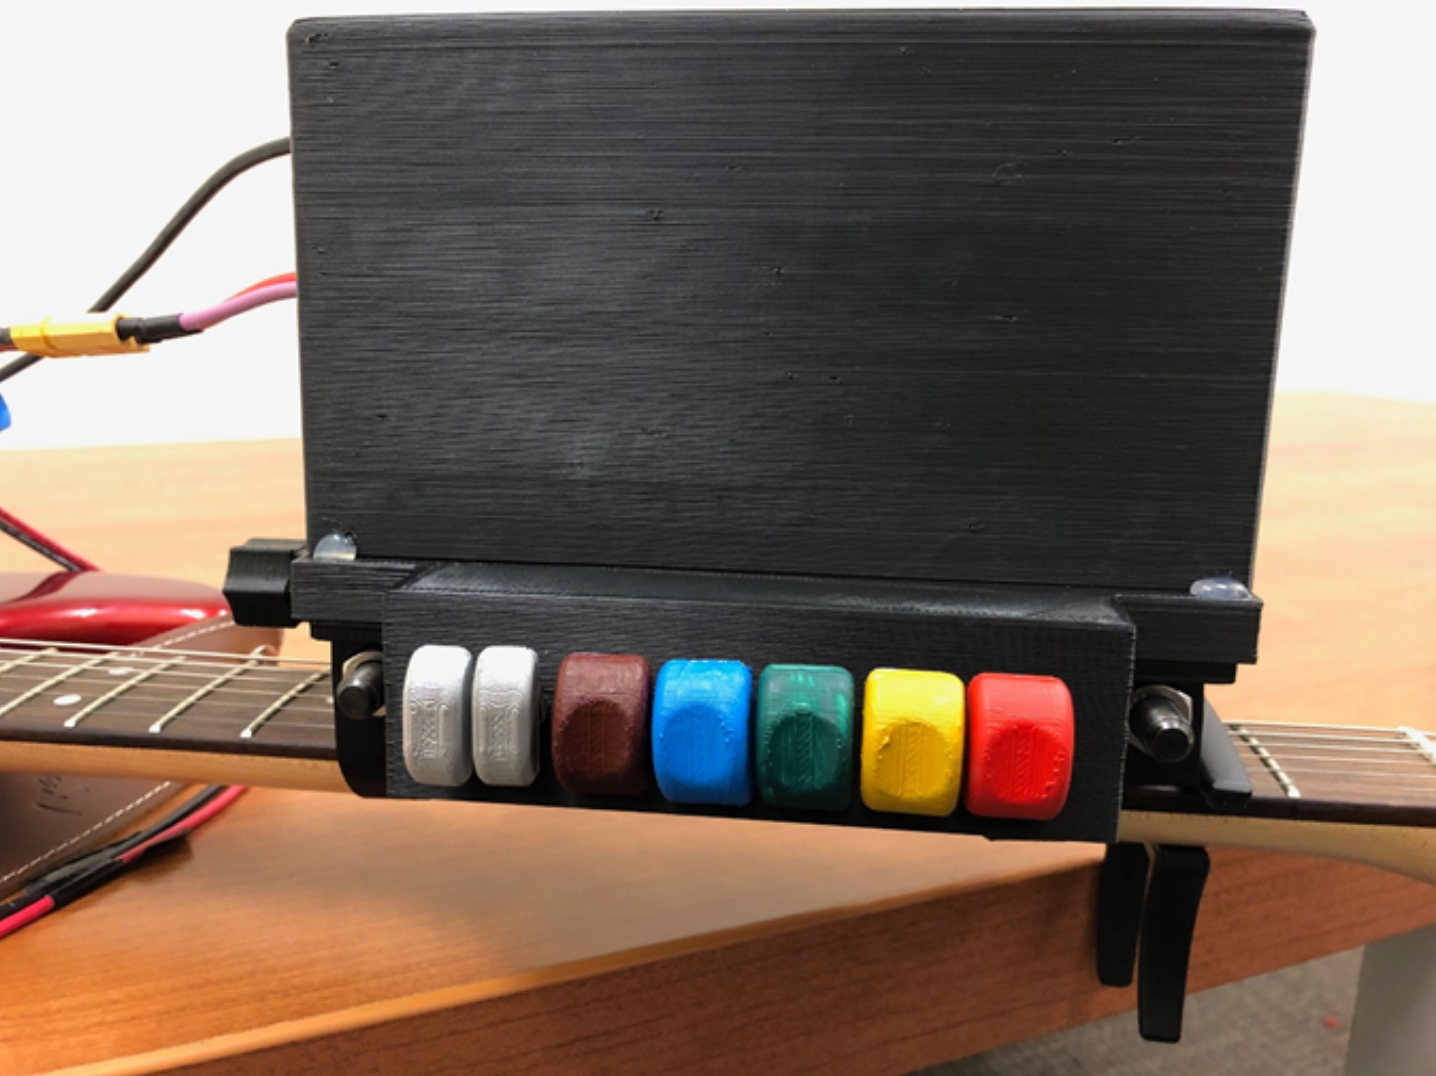
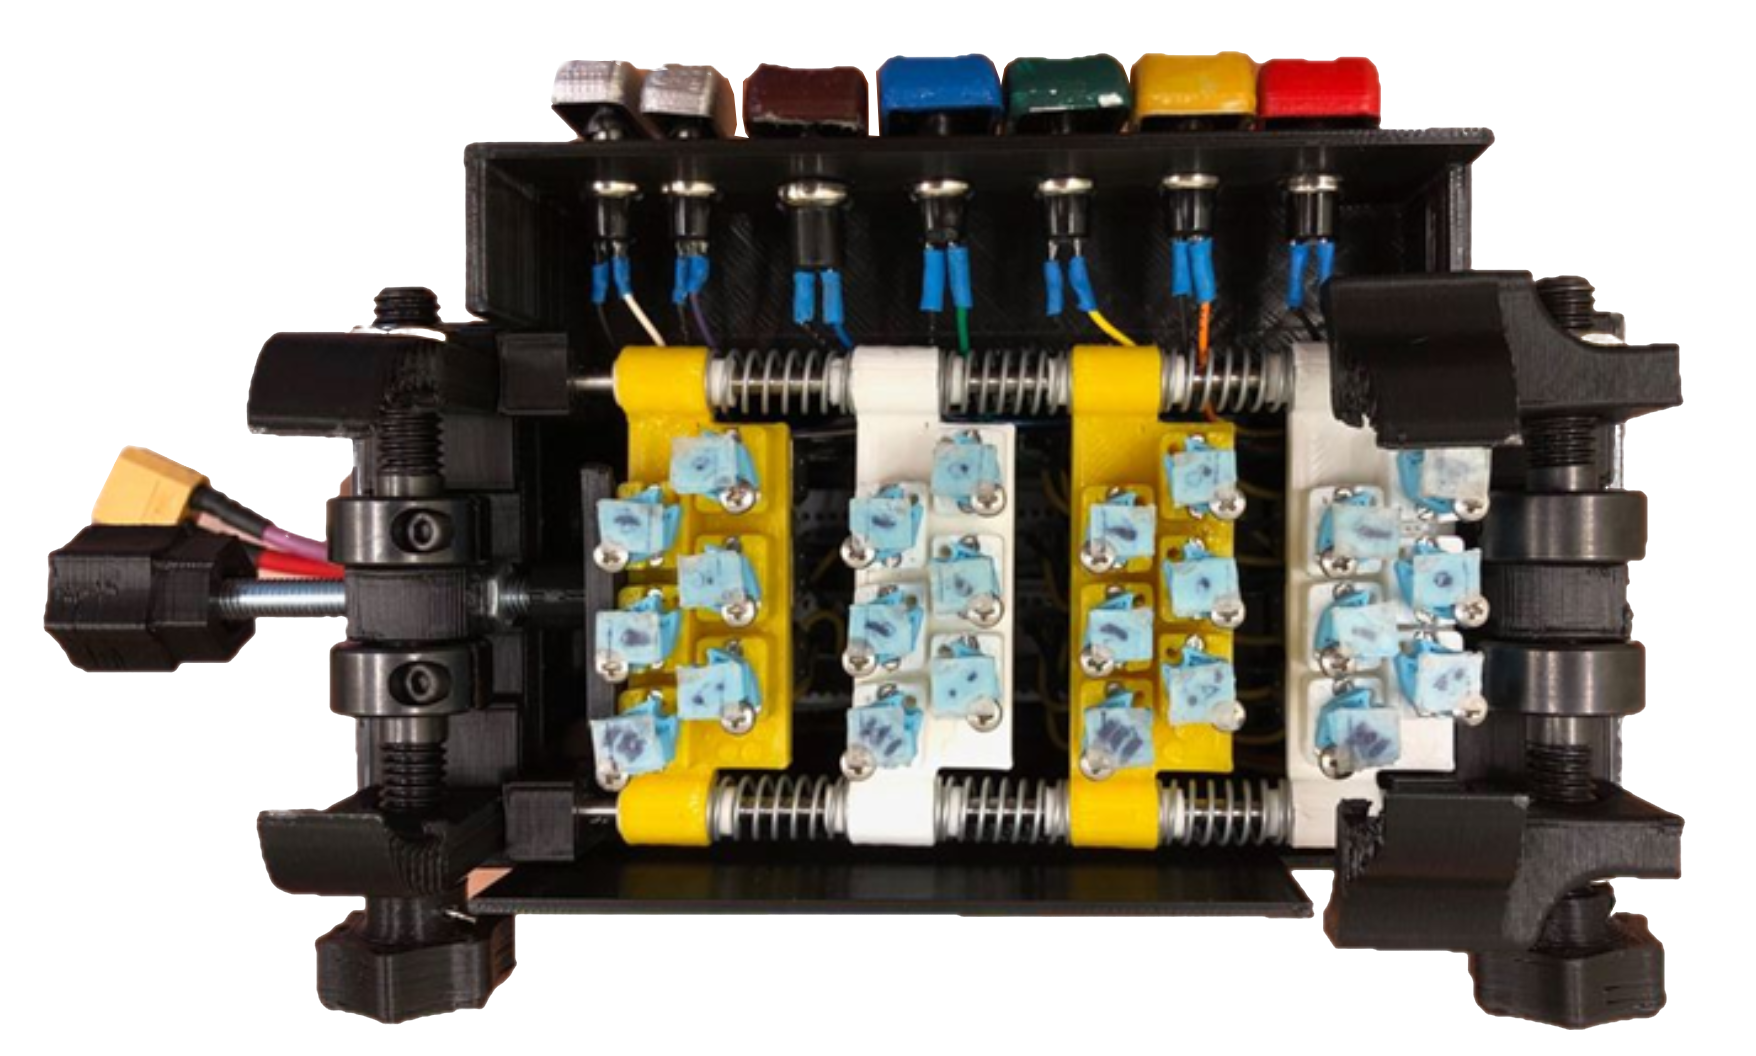
When one of the colored buttons along the bottom of the device is pressed, 24 small gear motors inside the device are actuated to press down on the guitar strings in specific configurations, forming chords. The buttons do not need to be held down and there is no need to memorize/master complex hand positions, greatly facilitating the mechanical aspects of playing the guitar.
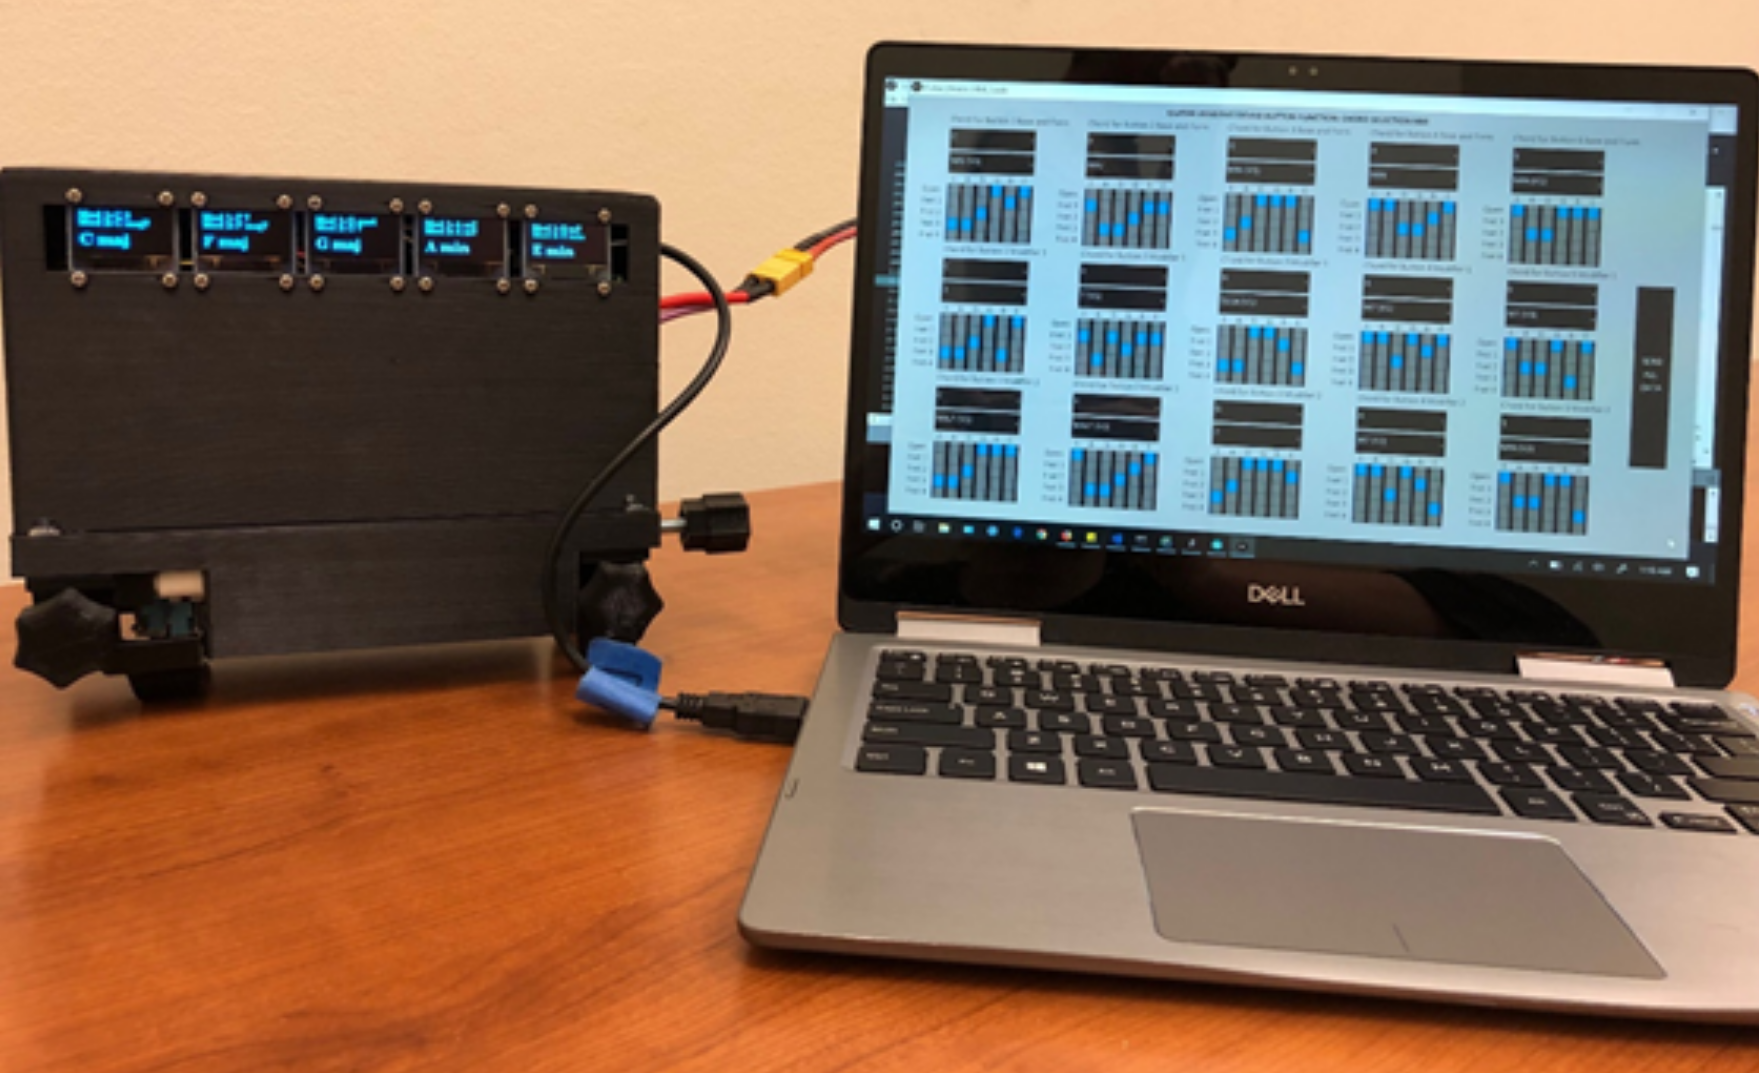
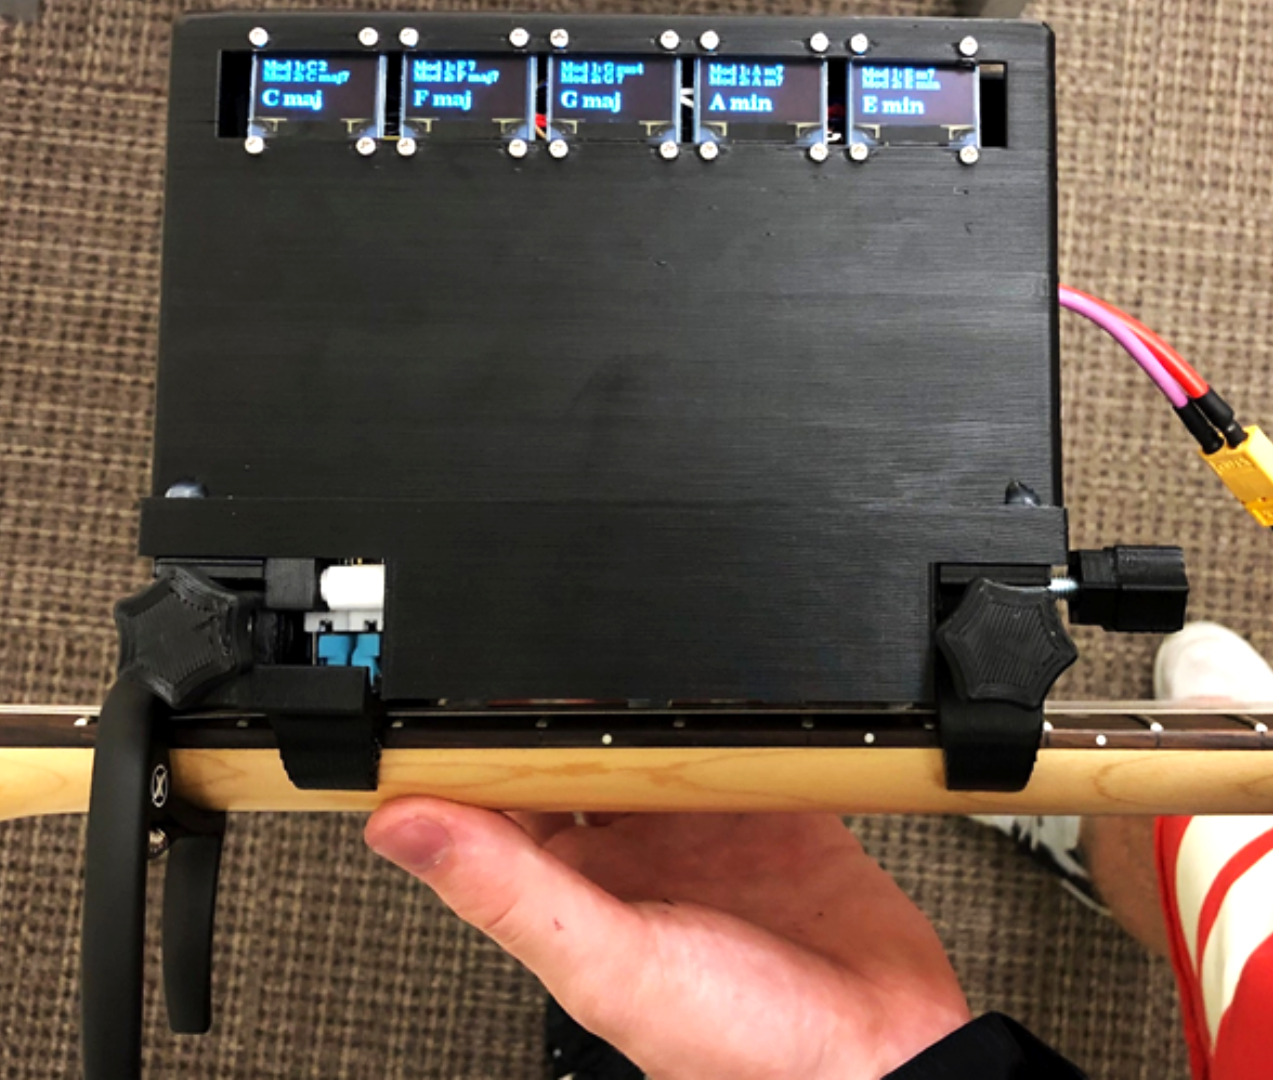
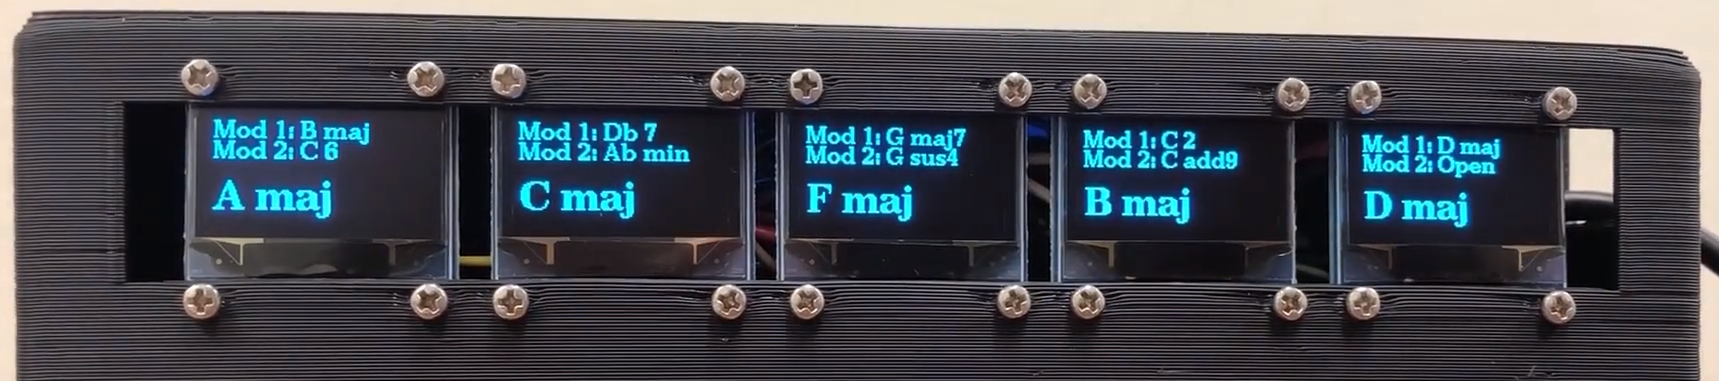
5 colored buttons allow for 5 main chords to be stored at a time, and 2 “modifier” buttons can modify each of those chords for a little extra flair (ex: Am -> Am7 or D -> Dsus4). This allows the device to store up to 15 programmable chords at a time. These chords are completely customizable through our custom chord programming application, which allows users to select from 142 default chords or define any completely custom chord in the 4 fret range. The currently programmed chords appear on the OLED screens on the top of the device.
Characteristics/Functionality
| Battery Life | ~3.5 hours of play time per battery |
| Button Press Force | 11% of normal string depression force |
| Device Attachment Time | ~47 seconds |
| Chord Change Time | 0.42 seconds |
| Dimensions | 18.75 cm x 16.25 cm x 11.5 cm |
| Weight | 1.185 kg (user support is not necessary to keep the guitar from tipping with SimpleStrings attached) |
Electrical Subsystem
Although I was involved in almost all aspects of this project, my primary responsibility was to design and manufacture the electrical subsystems. This involved designing an architecture to control/power all the components of the system, selecting those components, designing a PCB to mount/connect necessary components, and assembling/testing the system. An added mechanical challenge was conforming to the form factor of the guitar neck for the final prototype.
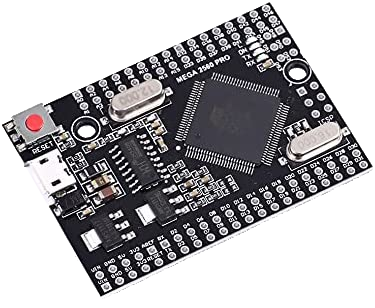
One of the main challenges was the amount of IO that we needed to control. 5 OLED screens controlled via I2C, 7 digital buttons, and a grid of 24 motors is a lot of IO points to consider. Our solution was to use the Arduino Mega 2560 Pro - a smaller form factor version of the Arduino MEGA 2560 - for its extra IO capacity and shift registers to send commands to motor control boards.
Expand for more technical details on the IO handling.
Even with the higher capacity Mega 2560 Pro board there was not enough IO to independently control each of the 24 motors with a PWM signal. Part of the solution for this was to use separate motor control boards, which allowed us to use simple digital signals to send commands to the motors. Still, multiple digital signals to each of the 24 motors meant quite a bit of digital output pins to use. Instead, our solution was to use an array of shift registers to which we fed motor commands serially. Since we always needed to send commands to all motors at the same time (during a chord change), we could simply load our commands into the shift registers and then trigger movements simultaneously.
We also used 5 small OLED displays, roughly lined up with the buttons below to encourage a spatial relationship between the buttons and the data on the screens.
Expand for more technical details on the OLED displays.
These particular OLED displays communicated over I2C, but only had 2 options for I2C addresses. In order to control each display individually, we had to make use of an I2C multiplexer. This allowed us to toggle between the screens to send updated data as necessary.
Finally, we decided to create custom PCBs to hold our components for several reasons. First, even though this design was intended as a prototype, we didn’t feel that a breadboard setup would be reliable, given the number of connections between components that was necessary. Secondly, a breadboard setup would have been much more bulky than a PCB setup, which would have made it difficult to mount to the guitar neck.
However, with designing a PCB comes the inherent risk that if directly soldered components were to break, they would be more difficult to replace. In an accelerated project time frame like this, this was an important consideration. So we decided to pursue a compromise - design a custom PCB to reduce the complexity and increase the reliability of component connections, but make heavy use of header sockets and pins so we could quickly remove and replace components if necessary.
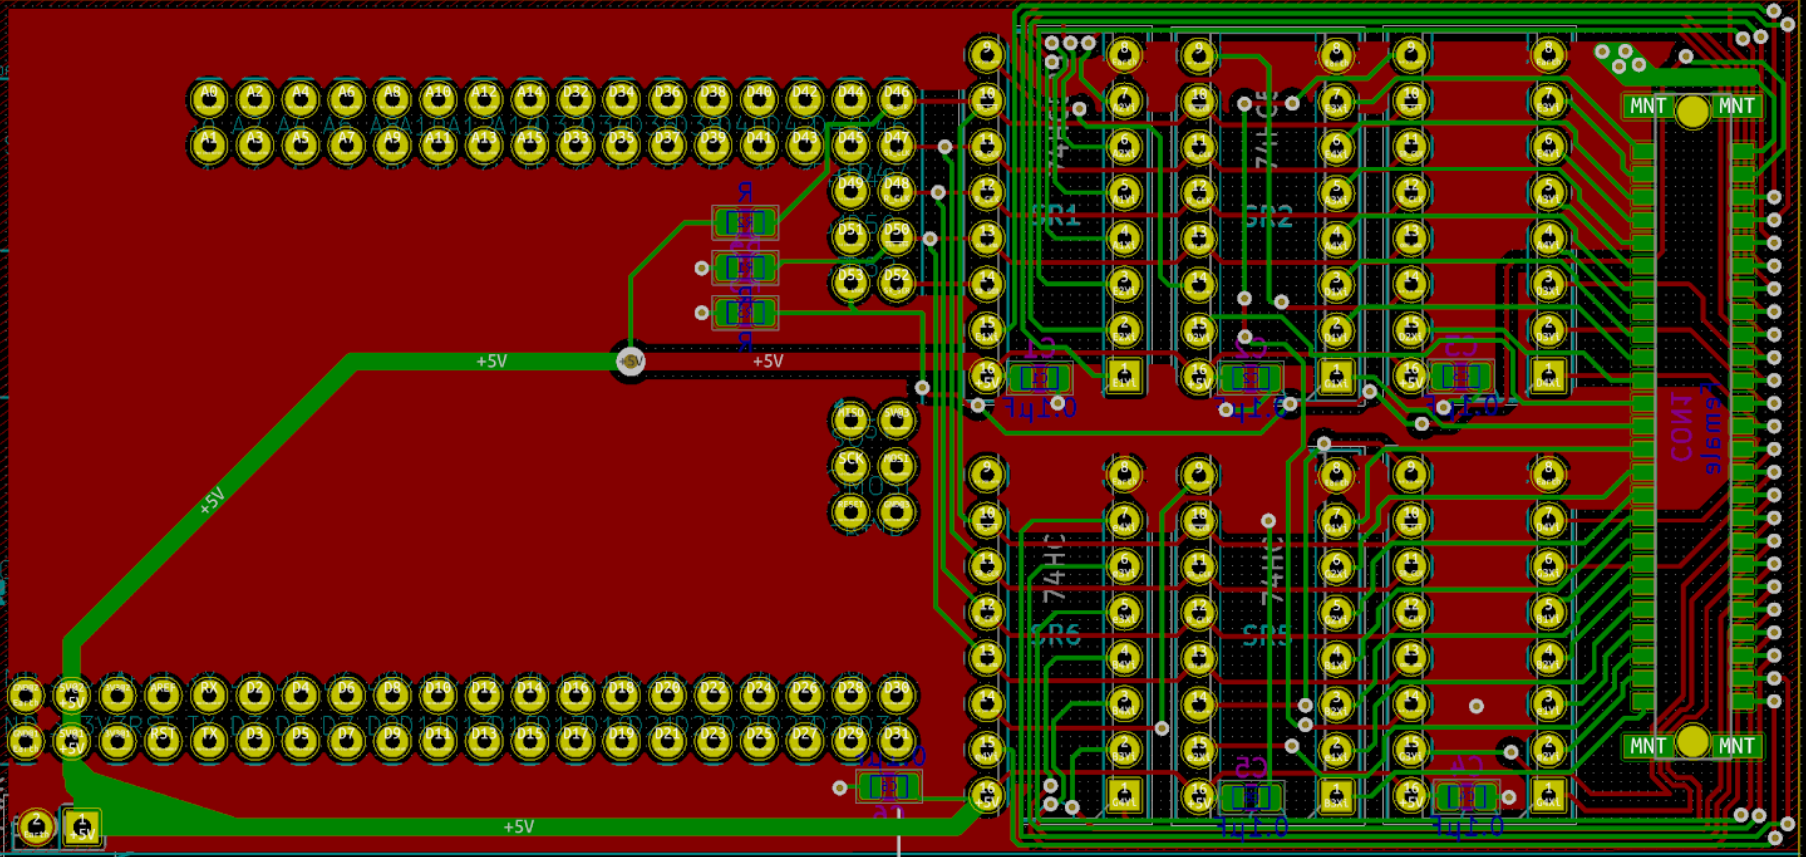
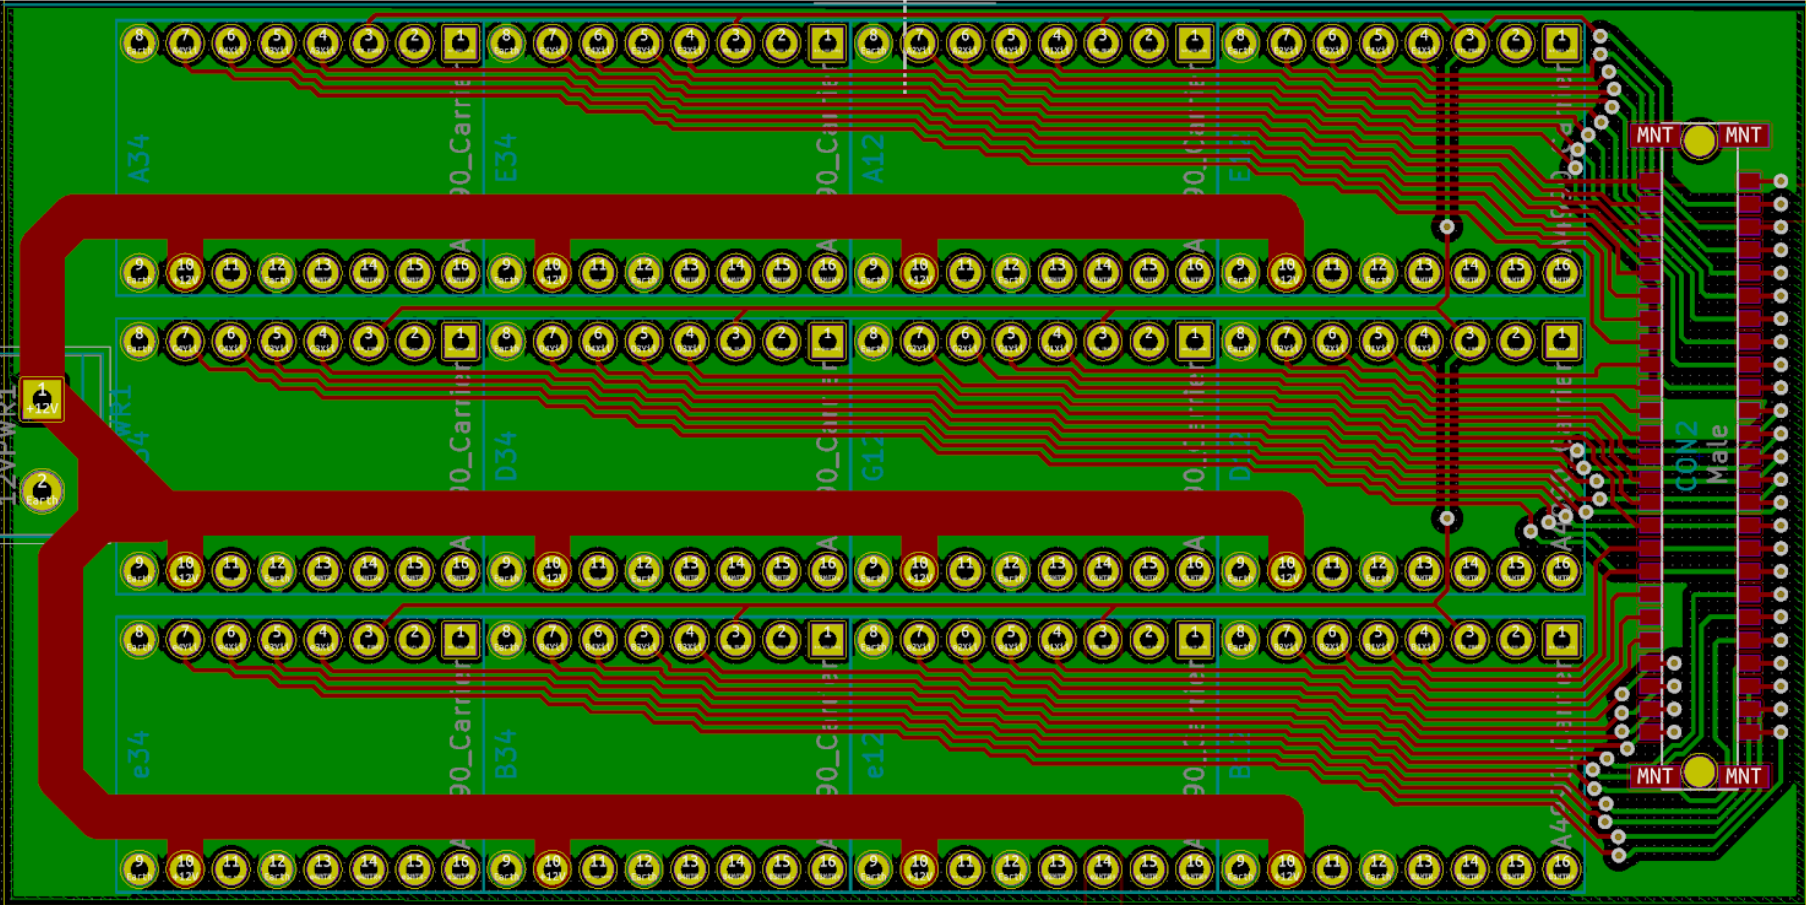
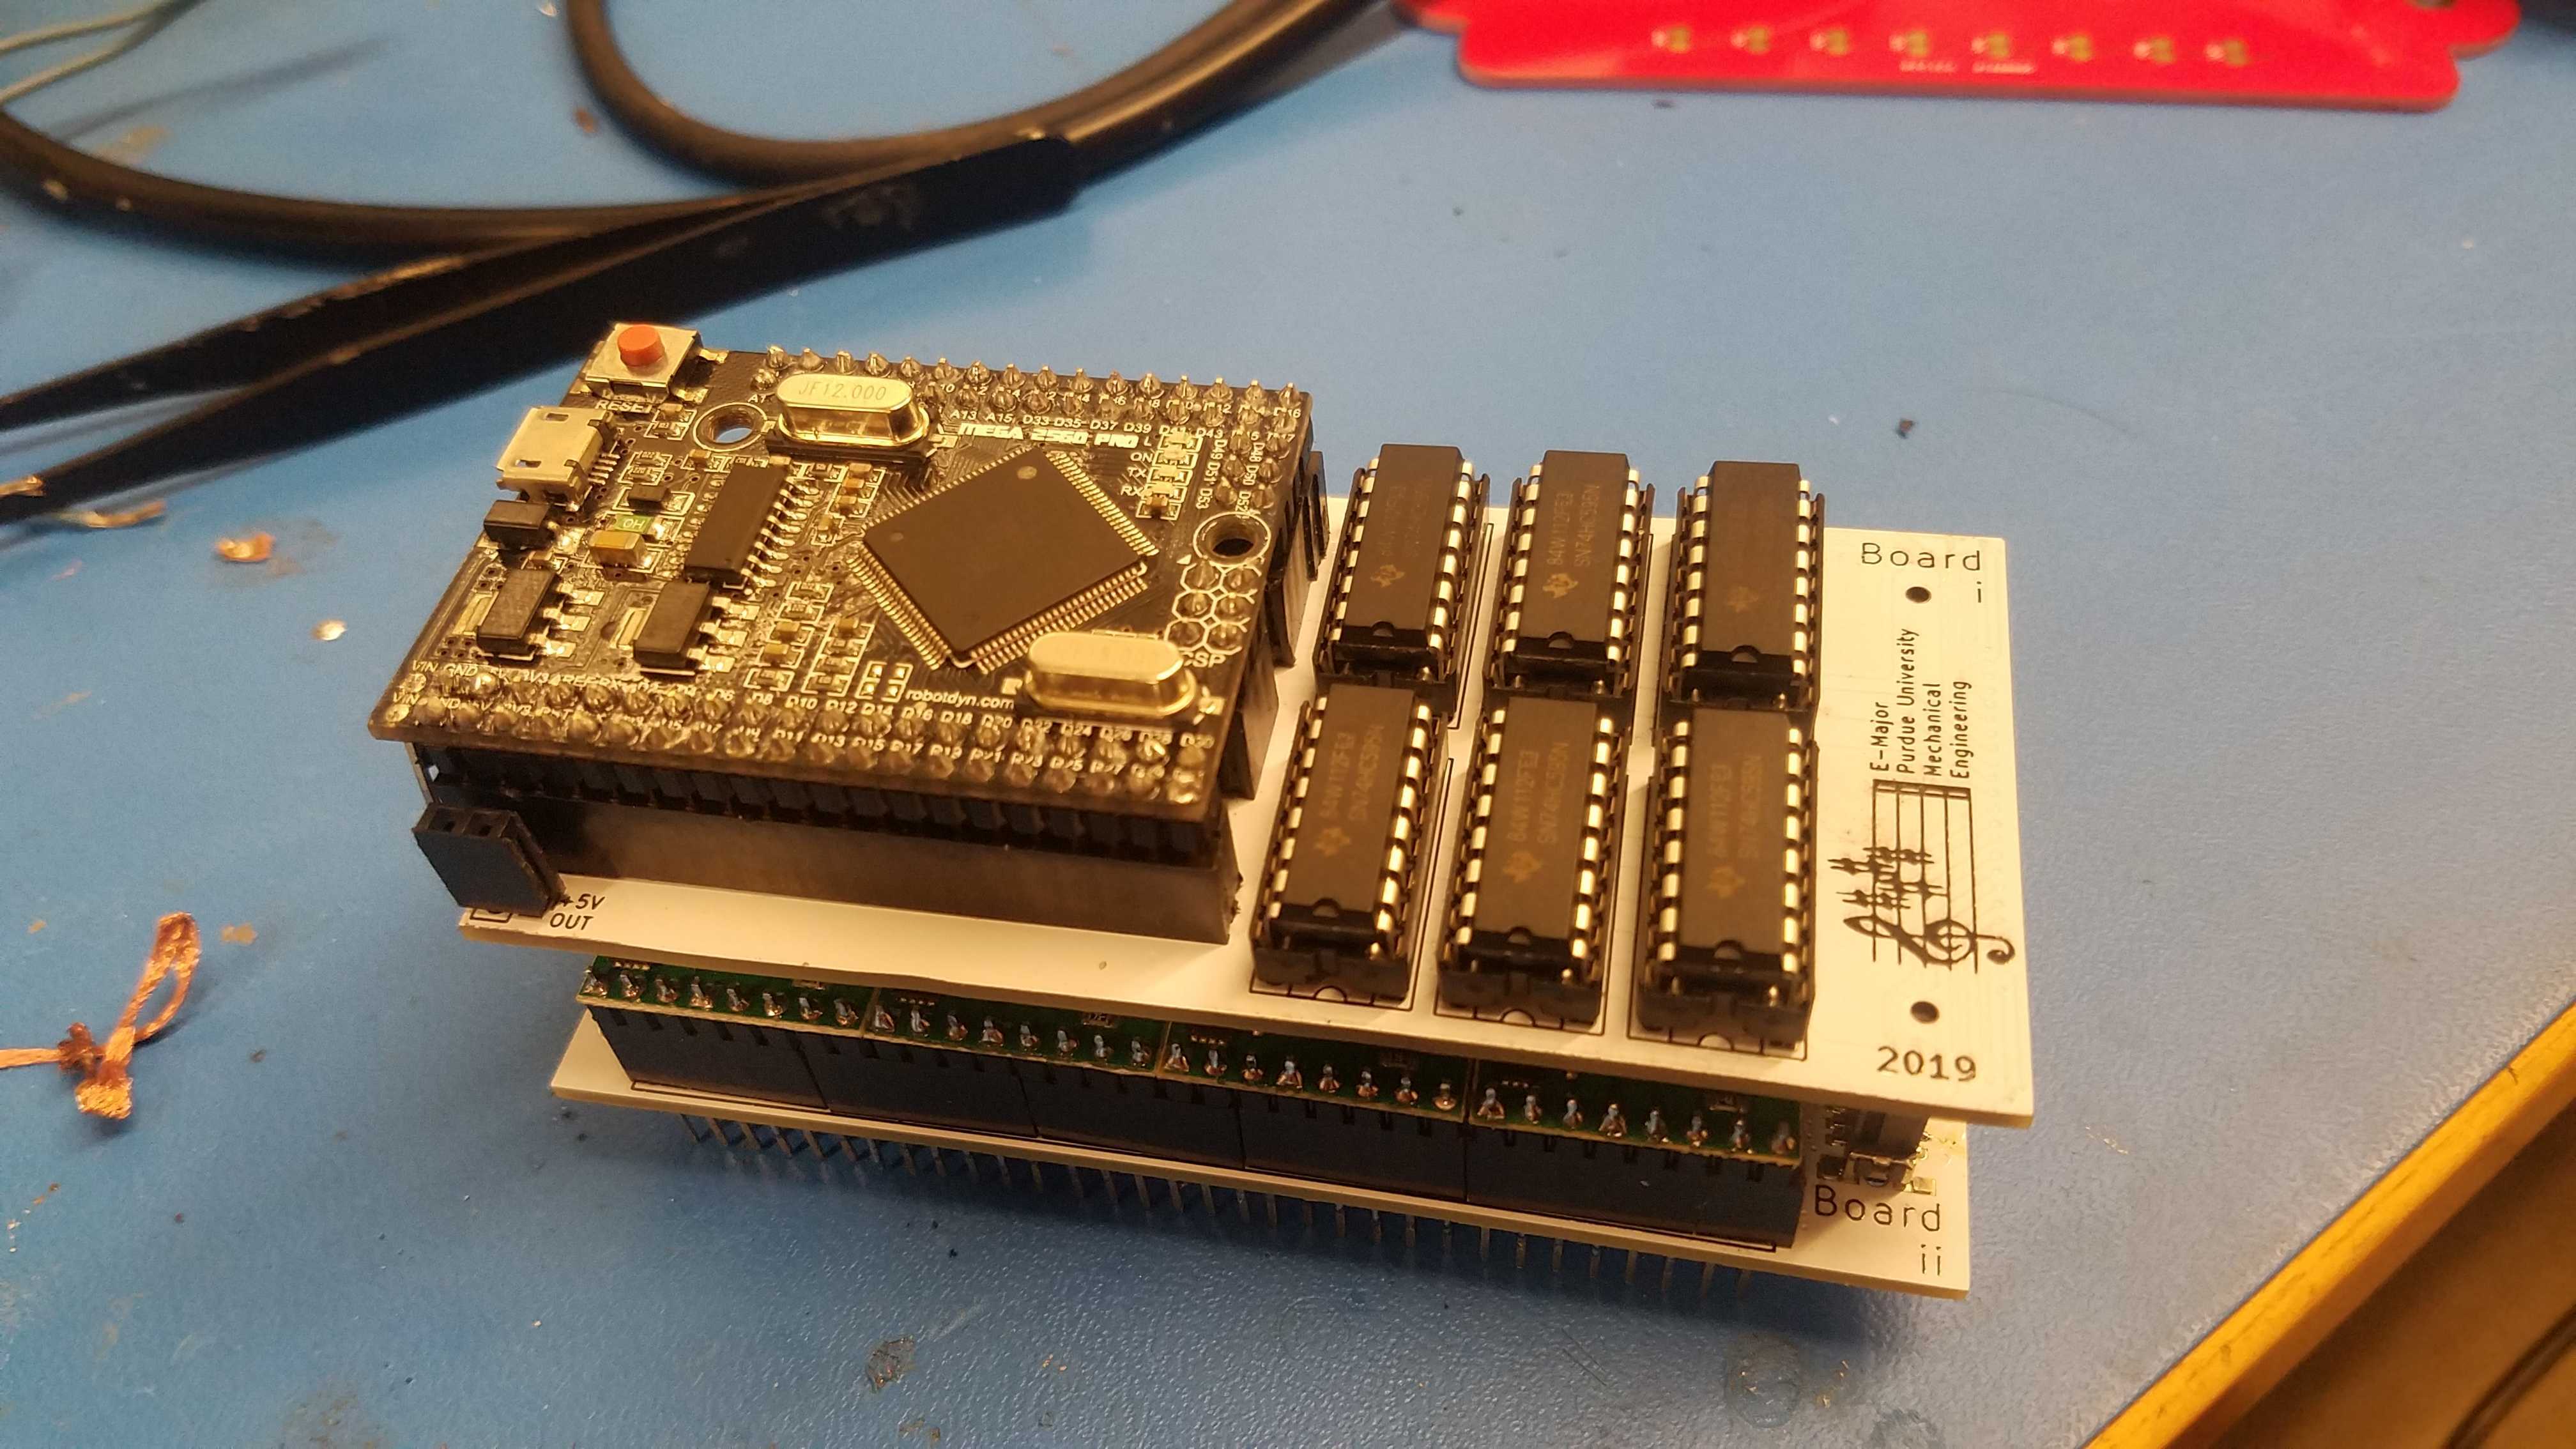
I designed and laid out the boards using KiCad. To fit all the removable components into the form factor of the guitar neck, I had to place the components into two separate boards that were stacked on top of eachother and connected via a 50 pin surface mount connector.
After completing the design, ordering, and receiving the boards, I soldered all the components together to create a finished product for the prototype.
Prior to the design of the PCB, we had completed successful breadboard tests for all the components. But our big moment of truth was making sure that all the components integrated together would still function properly. Thankfully, after the detailed design review our team did on the boards, all the components worked perfectly, and our project’s electrical subsystem was complete!
Future Work
Our design was only ever intended to be a first prototype of the SimpleStrings system, and there certainly were areas for improvement we would like to tackle if we pursued a next iteration. Some of our own desired improvements, as well as those we collected from the music therapists we talked to, are listed below.
1. The height of the device is very cumbersome.
This is perhaps the most significant improvement we could make for the product. It’s large, which makes it more difficult to transport, attach, see the buttons, etc.
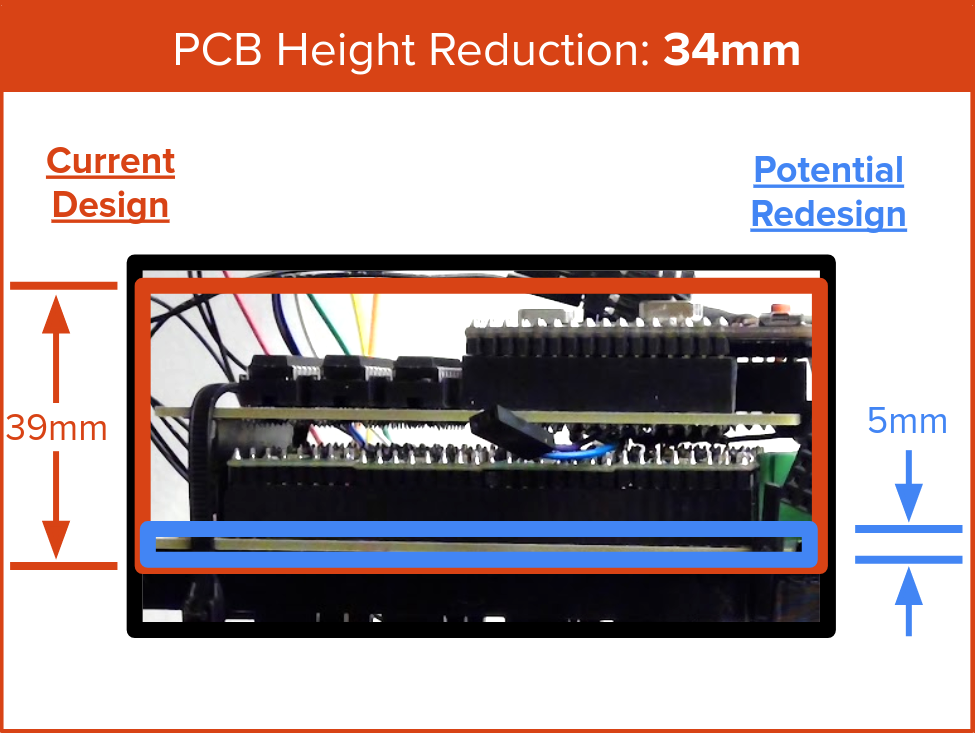
A lot of the height of the product is directly related to limitations of the prototype process. For example, our choice to use PCB components mounted in header sockets greatly increased the vertical height of our PCB design. This was a tradeoff for flexibility in prototyping that, if we were designing a next generation or final product design, I would certainly want to consolidate to remove vertical bulk. If replaced by surface mount components, we could reduce the PCB height by 85%.
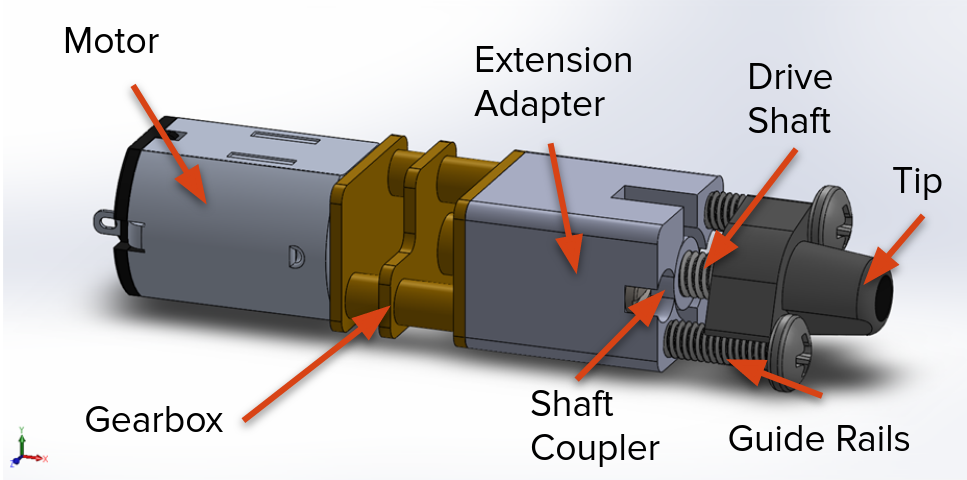
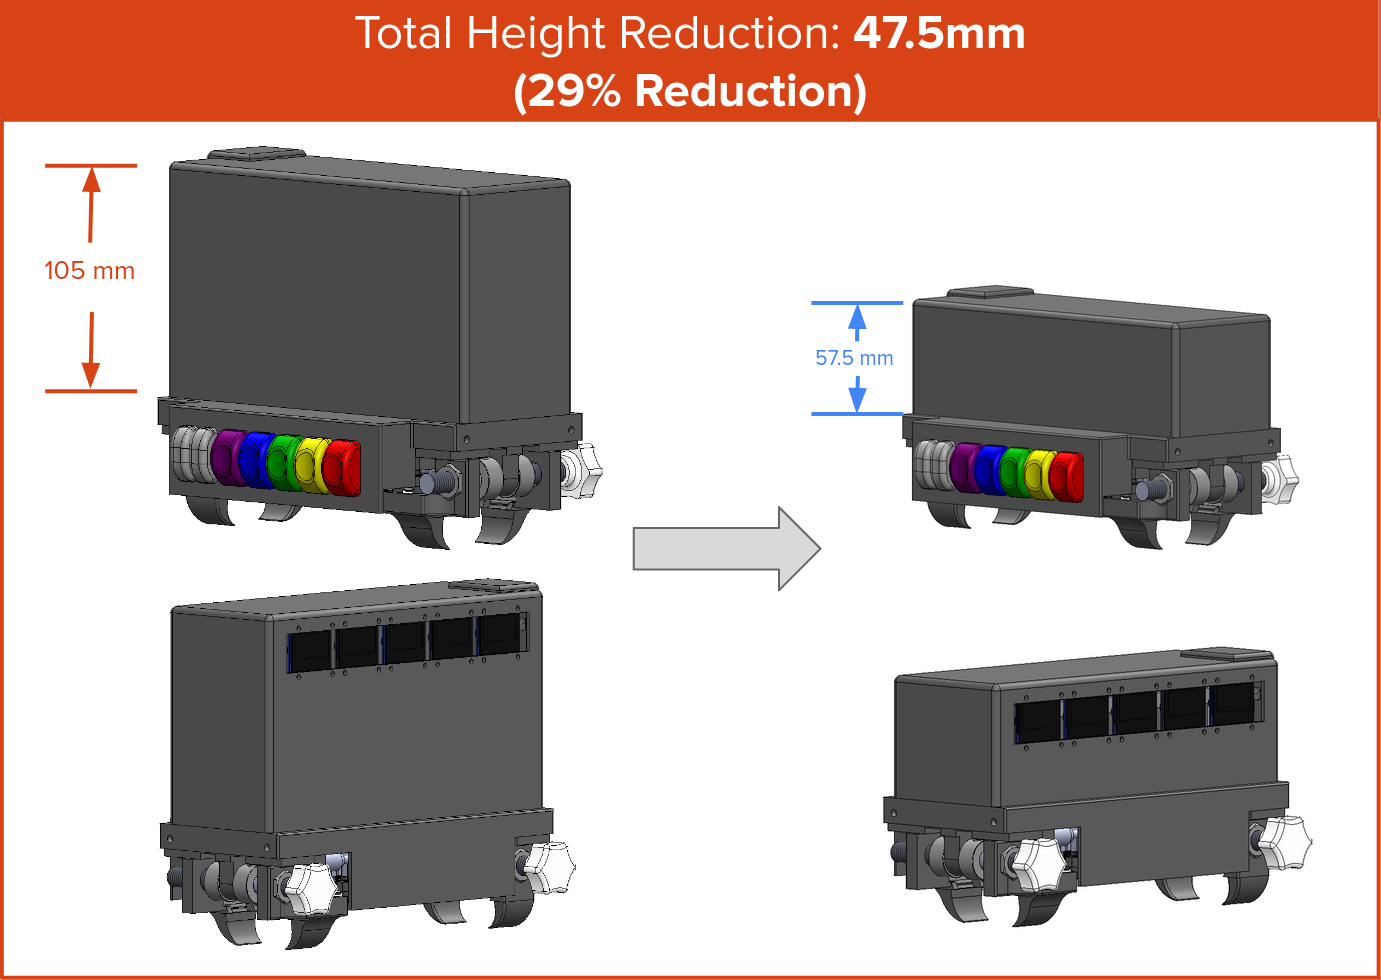
Similarly, if we could order our motors in bulk, we could specify a gear ratio built into our motors, rather than having an external gearbox. This would decrease the height of our motor assembly. These two reductions alone would reduce the total height of the device by 29%.
We could also explore other options for more efficient packaging of the components in our system to further reduce the height.

2. The screens currently don't indicate which chord is being played, which would be helpful for users.
This functionality would be possible with the current hardware and a software update, but we could even explore different options for color OLED screens and improve the UI of the device in general.
3. The buttons are difficult for users to see while playing the device.
Certainly reduction in height, as mentioned above, would help address this problem. We could also explore more ergonomic redesigns of the device form factor or improve the screen UI to reduce the relevance of looking directly at the buttons.
Conclusions
This capstone process was a great experience to go through the process of product design. SimpleStrings was incredibly fun to design and play with, and we hope it would be very helpful in music therapy contexts. We certainly have areas to improve, but no engineering project is finished on the first iteration!
Team Organization
In order to complete the entire design process from conceptual design to prototype fabrication in just 5 months, our team assigned roles to allow us to focus our efforts more efficiently as a team. The team consisted of:
| Kristen Gallett - Project Manager | Jared Borg - Chief Engineer |
| Emily Jackson - Procurement, Safety Lead | Jonathon Lemke - CAD Lead, Business Manager |
| Lindsey May - Software Lead, Customer Eyes | Nick Morales - Electronics Lead |
Finally, here’s an extended cut of the project video: